Using RuuviTag with IoTool
Overview
Skill level: Any skill level
This guide will explain how to use the RuuviTag with the IoTool application. It’s quite easy to do both in URL or RAW mode.
Ingredients
-
RuuviTag sensor with default (weather station) firmware
-
BLE-supported Android device with IoTool and IoTool RuuviTag extension installed
Step-by-step
-
About IoTool
IoTool, a multi-awards winning smartphone gateway and API allows IoT researching and fast prototyping with minimal costs. Currently IoTool supports more than 100 different sensors with more than 250 sensor readings, 50 actuators (like Arduino, Lifx and similar) and different types of triggers connected to ordinary smartphone through a very flexible extensions system. All sensors, actions, actuators, algorithms, triggers, or cloud sync services use their own extensions (similar to printer drivers). External developers can develop their own extensions (usually an extension can be made in a matter of hours) and UI for any type of IoT solution.
IoTool works on Android devices (phone, tablet, Android TV, Raspberry PI with Android OS installed). IoTool can process (collect, encrypt, store, show values and diagrams, sync to cloud) up to 24.000 records per second, for example 12 lead ECG with 2000Hz.
-
IoTool installation
-
Register and login at https://iotool.io.
-
Download the IoTool application. The Play Store link is located on the landing page.
-
Find the sensor extension page for RuuviTag at https://iotool.io/extensions/sensors/ruuvitag-3. Here you will find the Play Store link and other useful information.
-
Install the sensor extension to your smartphone from the Play Store.
-
-
Setting the RuuviTag mode
URL mode is set by default on all RuuviTag sensors. It broadcasts rounded environmental measurements (temperature, humidity, air pressure), but no accelerometer or battery data. The data is broadcast twice per second. You can find out if your RuuviTag is in URL mode by opening the case and looking at the green LED light. It should blink every 5 seconds.
If you also want to gather accelerometer and battery data along with environmental data, you should switch your RuuviTag to RAW mode by pressing the B button. You will see the green and red LED lights light up for a moment followed by the red LED light blinking every second.
The schematic below will help you identify the correct buttons and LED lights.

-
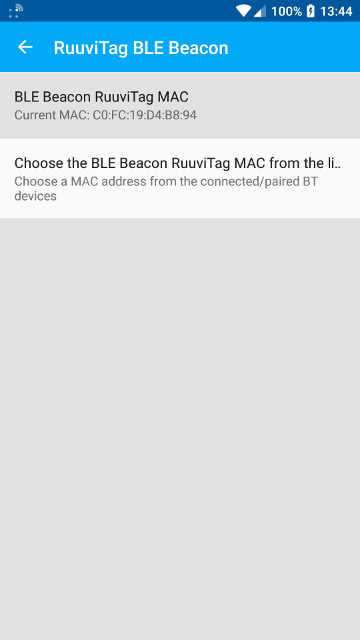
Configuring IoTool to connect with RuuviTag Open the IoTool application and select Settings from the main drawer menu. Then head on to the sensor menu and find and select the RuuviTag entry.

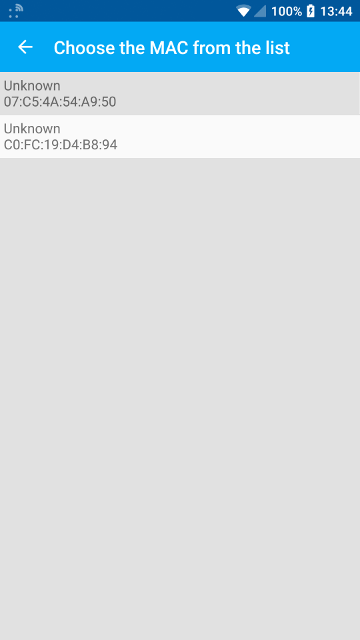
Select your RuuviTag’s entry. If you own multiple devices you simply can try all of them or use an external BLE scanner (like officially endorsed nRF Connect) to tell them apart by their MAC addresses.

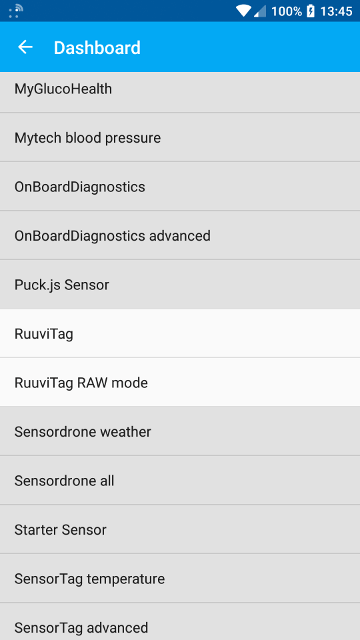
Head back to the main Settings menu and select Dashboard. Find and select the RuuviTag or RuuviTag RAW mode entry depending on your choice in step 1.

-
Reading RuuviTag data Head back to the dashboard, make sure there are 3 buttons for URL mode or 7 buttons for RAW mode. Press the Start button to begin measuring. There might be a small delay before you see the measurements due to the nature of BLE. image::measure.png[width=200]