Odoo Creating Custom Module and Dashboard

Introduction
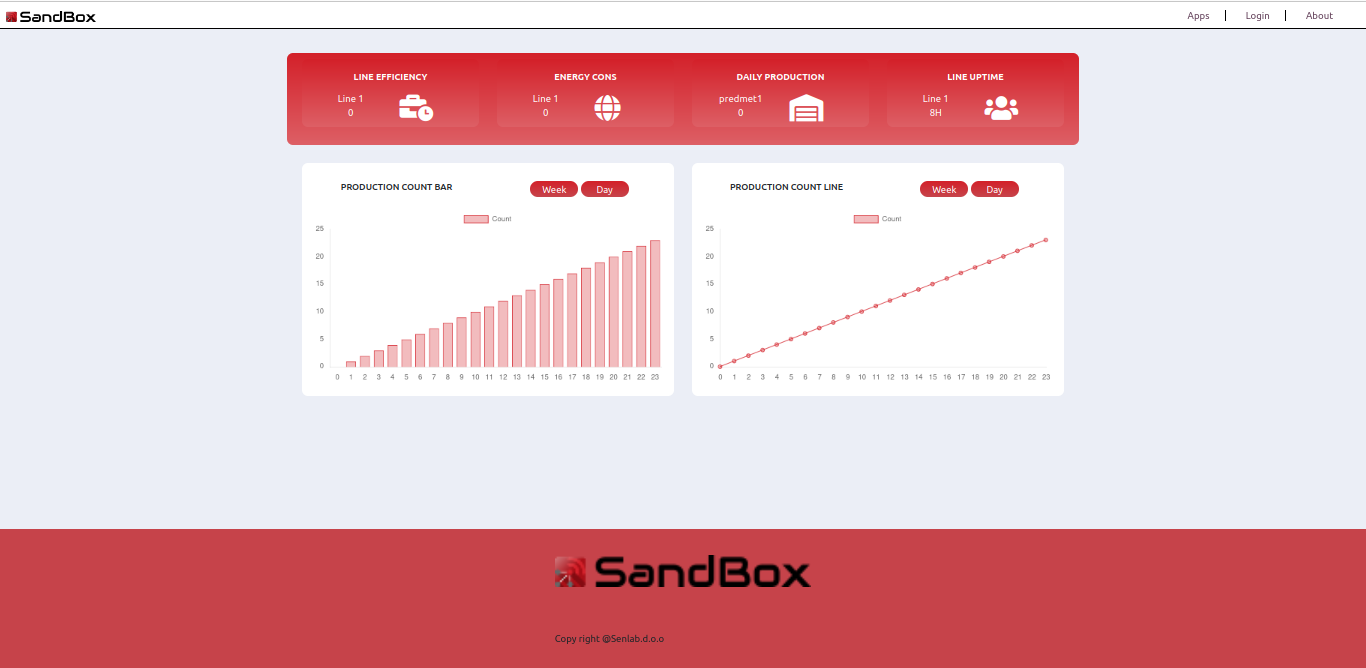
In this section, we’ll walk through the process of creating a custom dashboard within Odoo. This dashboard along with module will be used for displaying data and adding logic for data manipulation.
Prerequisites
This tutorial assumes you already have Odoo service setup on your Sandbox product.
For more information on how to do that, please refer to this documentation: Odoo
Creating and Mounting a Custom Module

Module will define which data is present in the project and will handle logic for operations on this data.
Module Development: Start by setting up a development environment for Odoo module creation. This typically involves creating a new directory on your local computer, this directory will be mounted to path /etc/addons inside Odoo container, as this is the specified directory for custom Add-ons. Custom module needs to be populated with the necessary files.
In the development of an Odoo custom module, several key files and directories form the foundation of the module’s functionality and integration with the Odoo system:
*manifest.py*
The manifest file is the heart of any Odoo module. It contains metadata about the module, including its name, version, dependencies, summary, author, and more. This file is essential for Odoo to recognize and correctly handle the module. It also defines which data files should be loaded, such as security permissions, data files, and view definitions. Example of how manifest file should look is present in our example project. Most of the configurations are self explanatory, two most important sections of manifest file are data and assets. Data section is used to declare files for module creation which should be included, among them are the security csv and xml files which define our dashboard. Assets section should include javascript and css files for the dashboard.
*init.py*
This is an initialization file used by Python to recognize a directory as a Python package. In the context of Odoo module, init.py typically imports the models and controllers defined within the module, ensuring they are registered with the Odoo framework upon module installation. In simple modules this file is included inside the controllers and models directory. This is example of how init file should include: from . import my_model
models/
The models/ directory houses the Python files defining the module’s data models. These models extend or modify the existing Odoo models (or create new ones) to support the custom functionalities introduced by module. The structure and behavior of data used within module are defined here. Most simple Module files will only include lines which define data to be held inside PostgreSQL table.
Below is example line of how to define specific data inside the table:
name = fields.Char(string=`Name', required=True)
This simple line defines SQL column which will hold string, there is also column name and option if this type of data is required in every incomming message.
views/
The views/ directory contains XML files that define the user interface components for module. These components could be forms, lists, kanban boards, or other elements that allow users to interact with your module’s data. Views are linked to models and specify how the data from those models should be presented to the user.
examples of the XML files can be found in the project. Views offer very limited capabilities for front-end module development and can serve for quick development of module. For extended functionallity Odoo’s QWeb controller should be used.
Views offer quick development using predefined XML tags like menuitem and actions.
dashboard offers more functionallity and freedom creating custom module, there is easier way to implement quick and simple module inside odoo, as you can only define xml files and these pages will be integrated inside the odoo module, there are 2 main elements, those being menus and actions. Menus allow you to create custom menus inside Odoo dashboard or modify existing ones, this is the definition:
<menuitem id="exampleId"
    name="exampleName"
    parent="rootMenu"
    action="customAction"/>
this is very simple example, which creates additional menu item named exampleName, which is going to be added to the existing items inside the rootMenu, if there is a need to add menu item to the specific menu, you can look up the name of that menu inside the odoo settings under the technical section. If the menuitem is not seen after the update of the module the reason is probably that the user does not have right privileges to view the item, for developing purposes it is advised to use superuser.
Actions:
<record id="exampleAction" model="ir.actions.act_window">
        <field name="name">Action</field>
        <field name="type">ir.actions.act_window</field>
        <field name="res_model">action.test</field>
        <field name="view_mode">tree,kanban,form</field>
        <field name="help" type="html">
            <p class="o_view_nocontent_smiling_face">Action test!</p>
    </field>
</record>
this is a simple example of defining the action, actions decide what is going to happen or display when the menuitem is selected. In above case window is opened which holds data from the specified module, view modes define different displays which will be available inside the module view, options in the example are predefined.
controllers/
Controllers handle the web routing for your module. If your module includes dynamic web pages or needs to respond to specific HTTP requests, the logic is defined in the controllers/ directory. This is particularly relevant for modules that add frontend features or need to interact with users via web interfaces. In our example controller has 2 endpoints, one for rendering our dashboard and one which holds data in json format which is then taken inside the dashboard for display.
security/
The security/ directory contains the Access Control Lists (ACLs) and record rules. These XML or CSV files define who can do what within your module, such as read, write, create, or delete permissions on the module’s models. Proper configuration of security settings is crucial to protect sensitive data and ensure that users only have access to the appropriate functionalities within your module.
static/
This directory is used for static files such as JavaScript, CSS, and images that are part of your module’s frontend. For dashboard implementations, the static/src/js, static/src/css, and possibly static/src/xml for QWeb templates will be particularly important. These files define the interactive and visual elements of your dashboard.
 your_module/
 │
 ├── __init__.py
 ├── __manifest__.py
 │
 ├── models/
 │   └── your_model.py
 │
 ├── views/
 │   ├── your_view.xml
 │   └── another_view.xml
 │
 ├── controllers/
 │   └── main.py
 │
 ├── security/
 │   ├── ir.model.access.csv
 │   └── another_security_file.xml
 │
 └── static/
     └── src/
         ├── js/
         │   └── your_script.js
         ├── css/
         │   └── your_style.css
         └── xml/
             └── your_template.xml
Working with Odoo
1. Module installation
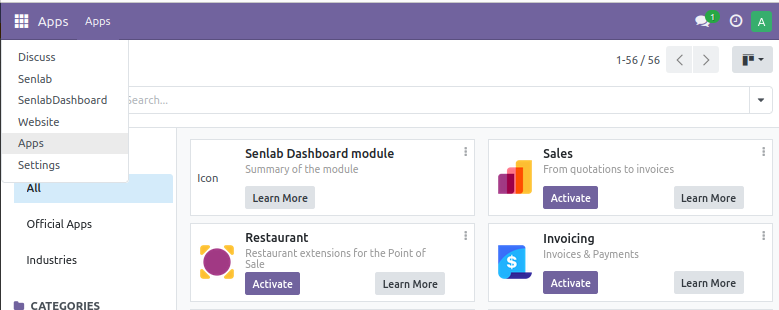
Log in to your Odoo instance, navigate to the
Apps menu, and remove the Apps'' filter. Search for your custom module
by name, then click Install'' to integrate it with Odoo. Settings
Configuration: Depending on the functionalities of your custom module,
you might need to configure certain settings within Odoo. This could
involve setting up model fields, configuring access rights, or
specifying parameters that your dashboard will use to fetch and display
data.
2. Creating Static Files for the Dashboard
For a dynamic and interactive dashboard, you’ll likely need to include static files such as JavaScript, CSS, and possibly HTML templates.
Static Files Structure: In your module directory, create a static folder, which is typically structured as static/src/js for JavaScript files, static/src/css for stylesheets, and static/src/xml for QWeb templates. These files will contain the custom functionality and styling of your dashboard. Implementing Dashboard Logic: In your JavaScript files, implement the logic for fetching, processing, and displaying data. This could involve making AJAX calls to Odoo’s backend to retrieve data models, calculating statistical data, and using libraries like Chart.js or D3.js to render charts and graphs. Integrating with Odoo Views: To display your dashboard within Odoo, you’ll need to create a view (XML file) that references your static files and sets up the layout of your dashboard components. This view is then added to your module’s views directory and declared in the manifest.py file.
By following these steps, you will have created a custom module in Odoo that adds a fully functional dashboard to your instance, complete with custom data processing and interactive elements. This process not only enhances the capabilities of your Odoo instance but also provides valuable insights through the visualization of statistical data.
3. Static files
3.1. XML and HTML files
This is standard static file used for front-end developing, which mostly consists of HTML elements, but implements also XML mostly for importing data from the existing layouts, in this documentation we will go through few concepts which are cruical for Odoo integration and layout.
Layout Inheritance
Inheritance Mechanism: The dashboard inherits the base layout from website.layout using
<template id="assets_custom" inherit_id="website.layout" name="Custom Assets">This approach allows you to extend and customize the existing Odoo web layout without altering the original structure. Custom Assets: Within this inherited template, new stylesheets (dashboard.css) and JavaScript (dashboard_action.js) are included, along with external resources like Font Awesome icons and Chart.js for charts.
This is section is very important if you want to change existing Odoo design, to find classes and ids of elements we want to change inspect can be used inside browser which is useful tool for debugging front-end code.
Custom Header and Footer
The dashboard customizes the website’s header and footer using the replace position attribute in
<xpath expr="//header" position="replace">
<xpath expr="//footer" position="replace">
allowing user to define entirely new content for these sections, such as a custom logo and navigation links.
Bootstrap Grid System
The dashboard layout utilizes the Bootstrap grid system to organize
content into responsive grids. This system is evident in the use of row
and col-md-* classes that help in structuring the dashboard widgets.
Example: In <div class="row" id="first_row">, several columns
(<div class="col-md-3 .no-padding">) are defined to hold individual
dashboard widgets, ensuring a responsive and structured layout.
Charts Integration
The dashboard incorporates Chart.js for data visualization, as indicated
by the inclusion of
<script src="https://cdn.jsdelivr.net/npm/chart.js"></script> and the
use of <canvas> elements for rendering charts
(<canvas id="barChartCount"></canvas> and <canvas id="lineChart"></canvas>).
3.2. CSS
<link rel="stylesheet" href="/odoo/static/src/css/dashboard.css"/>this is a sample line for including styles inside HTML element. There are numerous options for styling texts, objects, background and more. Inside example you will be able to see that elements have prefix of . or #, # is used to signify that the element with specified id should be styled, . is used for specifiying that this is the name of the class.
3.3. JavaScript
Javascript code is used for implementing the logic for the dashboard. Most important concepts in this section of the project is how to target specific elements from the html code and how to assign them functionallity.
document.addEventListener('DOMContentLoaded', async function())This line waits for the webpage to fully load before running the enclosed code. It ensures all HTML elements are loaded, making it safe to initialize JavaScript functions or manipulate DOM elements.
switchDisplay_box1.addEventListener('click', function() {
        currentEfficiencyLineIndex = (currentEfficiencyLineIndex + 1) % items.length;
        updateDataAndDisplay();
});
This snippet adds a click event listener to an element (referred to by switchDisplay_box1). When clicked, it cycles through an array of items (items) and updates the dashboard display with new data by calling updateDataAndDisplay().